For a change of pace I painted my Panzergrenadier Platoon for Flames of War. I’ve had Flames of War models since the game first came out back in 2002. But, I’m now finally finishing my first army. Other projects caused this to be pushed back. A gaming buddy, John, is helping me out by assembling the remaining few items I own, which I will then paint.
I am playing with a Panzerkompanie intended for Mid-War. Back in the day the list was out of the Ostfront book. Now, it is from the Eastern Front book and is a Mittlere Panzerkompanie. Comprised mainly of tanks, which I assembled and painted from 2002-2009, the remaining units are a Panzergrenadier Platoon in trucks (no points for halftracks), a Scout Platoon using BMW bikes, and a Famo recovery vehicle. John cleaned up and glued all of my infantry onto their bases. This past Tuesday he gave them to me and I gave him half of the BMW bikes and the Famo.
Having never painted 15mm infantry posed a challenge. That was further complicated with the change of time period from 18th to 20th century. Exactly how would I paint the Wermacht troops? The Flames of War website shows the helpful Evan’s German Army Painting Guide Infantry 1939-43. That provided a lot of inspiration for what I do and do not want to do. Maybe it is unfair to say but I don’t care as much how my FoW models look. Whereas I greatly care how my American Revolution models look.
A few rules were set.
- The models would be painted in historically accurate colors…or close enough to that for my satisfaction
- A quick and dirty method would be used
- Each model would be primed, basecoated, inked/washed, highlighted/drybrushed, gloss varnished, and matte varnished.
- The models need to appear to belong with my existing Flames of War models
Everything else was up for grabs. I completed, excluding matte varnishing and basing, the 12 bases of Panzergrenadiers in a single evening. At most I spent 3 hours painting them.
Everything was primed with the German Armor Mid/Late spray. Almost all of the paints used were Vallejo (the German Infantry Paint set was used) with inks coming from Games Workshop. They were then basecoated with German Fieldgrey (830). Once dry I used Badab Black as a wash. This creates a nice shadow effect as it gets into the dark recesses. Using Green Grey (886) I drybrushed the entire model. This covered 80% of each model.
I like to work my way from the largest area and the darkest color to the lightest color. This way any mistakes I make are easier to fix. Every gun and metallic device, like explosives, were next on my agenda. Boltgun Metal followed by Badab Black got the job done. I could have also used Chainmail for a highlight color but doing so would have made me crazy.
That last thing I wanted to paint was skin. Faces and hands, to be exact, needed distinction. Tallarn Flesh, thank you GW foundation paints, served as the basecoat. An ink of Ogryn Flesh made the skin more realistic. Finally, a quick drybrush of Elf Flesh finished the job.
Everything was sealed with GW’s ‘Ardcoat and will be sealed with Testor’s Dullcote. I could have done a lot more with these models. But, as I mentioned earlier, I want to get them done and on the table. The goal is for me to play casually, learn the rules, and have fun. Flames of War will be my secondary historical game, Black Powder being the first. All that remains is to base the models. I’m thinking of using sand, painting it green, and adding some tufts of static grass or lichen and twigs.
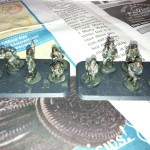
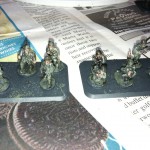
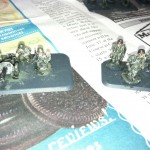
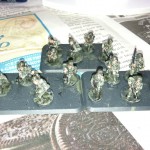
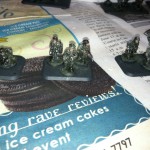
Pictures of the post gloss varnished/pre matte varnished models are below. What do you think? Don’t forget to check out my First Flames of War Game (yes, those are my panzers) and also Spotlight on Flames of War Fuel Dump Objective Marker.


They look good Jonathan. I can’t believe, truly can’t believe that these guys finally have paint! I look forward to grinding them into paste. Hear that funny “SPROING” sound? That’s a PIAT killing another tank :)
Part of me is equally astonished…and ashamed that it took me so long to get these done. At least I’m motivated now. :)