Brigadier General Nathaniel Hawkinsworth was absorbed in the latest dispatches. The 22nd Massachusetts Brigade assembled at their camp where supplies trickled in. The civilian leaders were slow to dispense the necessary funds to equip his brigade with the armaments, clothing, food, baggage, and gun powder he needed to get the men ready for battle.
One of the dispatches warned of a British probe south of his position at a small town named Abington. It was mostly farm country but a small cadre of stores was hidden in the town along with an artillery battery promised to his brigade. The artillery must not fall into enemy hands!
Once he finished reading, a plan began to formulate. Colonel Abraham Turner would force march the 43rd Volunteers. With luck and some help from Providence they would secretly arrive before the British, meet up with the 132nd Continental Artillery, and defend the town. The detailed orders were drawn up immediately. Colonel Turner, blowing his nose on his handkerchief, entered the General’s tent to receive the orders. Immediately after he gathered his men and set off.
Only through the intercession of friends at the state house did General Washington even allow the 132nd to remain in Massachusetts. With a little more help they would be permanently detached to his brigade along with the already promised Continental infantry. Turner may not be the best for the job but he is certainly courageous and smart enough to adapt to the changing battle conditions. If only his men liked him better they’d march off a cliff at his order. General Hawkinsworth mused they would, in time, grow from merely respecting Turner to something more. War changes men….yes it certainly does, he thought.
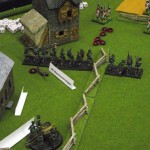
In record time the 43rd Massachusetts Volunteers reached the town. Colonel Turner deployed scouts and surveyed the town. At its edge were a few buildings and a series of fences that would provide a suitable defensive position. He ordered his men to dig in behind the fence. Captain Roger Ayer, commanding office of the 132nd Continental Artillery, worked with Turner to adapt the orders to the situation at hand. His artillery would deploy on the right flank where the fence formed a corner and continued back towards the town. He surmised this would provide an open field of fire out into the grassland where a copse of trees split the lush green carpet in half. The cannons would easily cover both approaches.
Turner’s left flank ended just past the final segment of fencing. A building stood behind, which could serve as a fall back position. On his far left flank stood a corn field and in the distance more trees. If the British knew of his existence they would surely sneak around his flank. Not that the Lobsterbacks were any good at sneaking. Their scarlet coats made them easy marks at 1000 yard with or without trees. His best men were positioned on his left flank with orders to maintain a good watch.
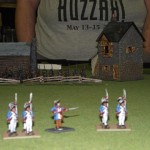
Part of the day passed when the clamor of armed troops marching was carried by the winds. In the distance a small unit, advance guard, clad in blue came into view from behind the copse of trees. Could this be reinforcements? Nobody mentioned anything but the British don’t wear blue….
The unit came closer and as they leveled their muskets, Turner realized that the British brought their Hessian mercenaries with them. “TAKE COVER!” he screamed. The order was passed down the line reaching the artillery on his right flank and the men on his left. Everyone ducked behind fencing, boulders, whatever they could. A cloud of smoke erupted from the Hessians. The bullets missed their targets. A man for hire simply isn’t the same as one willing to fight for his freedom.
The Americans prepared to return fire and ineffectively peppered the Hessians. The cannon boomed out but failed to range in properly. The Hessians marched closer. On the American left flank word passed down the line that the British were on the field. Mad King George’s redcoats split up with half sneaking around the trees and the other half rushing towards the Americans in a mad dash.
The Hessians charged Colonel Turner’s line. His troops were ready this time. They fired at will. Captain Ayer’s battery provided supporting fire. Clouds of lead flew at the Hessians and slammed into their line like a ton of bricks. Their charge faltered. Before their commander could react, the Hessians turned and fled out of firing range. A cheer erupted amongst the Americans. Colonel Turner knew that the respite would be temporary because the fighting would become intense once the British reached his line.
As the Hessians broke the British charged the American’s left flank. Despite careful planning the American’s were caught unawares as they reloaded from blasting the Hessians. They couldn’t get a single shot off as bayonets slid into a few guts. Colonel Turner ran down the line exhorting his men to “DEFEND THE POSITION!” Blood flowed as redcoat and American alike fell wounded and dead. It became clear that the militia held the upper hand yet the British wouldn’t break.
Thankfully only one of the two British units charged. The one in front seemed dazed from the effective fire that the militia poured into them before the Hessians charged. It would have been very difficult to deal with two line regiments at once. Inspired by Colonel Turner’s bravery his men redressed the line to face their foes, which charged their left flank. Now, the fight would be more even but also more daring. Turner’s right flank dangled in front of the other British infantry and Captain Ayer’s artillery was left on its own behind the protective cover of the fence. If the militia could press their advantage they would be able to send this British unit packing and then be free to deal with the remaining British and the Hessians.
The Americans redoubled their efforts killing or wounding scores of British soldiers. The lobsterbacks fled in terror from the ferocious Americans. Meanwhile Captain Ayer takes aim at the other British unit and sends a cannonball into their midst. It plows through a soldier, disintegrating him in a mist of blood and flesh. The Hessians use this time to regroup and prepare to once again advance into the fray.
Warmed by their close combat win the 43rd Volunteers redress the line and send a volley of fire into the remaining British. Seeing their comrades flee the field and being pummeled by superior American marksmanship is enough to send them in a panic. Almost as one they turn and run for their lives.
Another cheer erupts from the entire American line. The Hessians remain the only thing that stands in front of victory. Shots are traded between the two sides with the Hessian troops unwilling to march any closer to the Americans. Its deadly over there, they think. Finally a cannonball takes the head off a musketeer. Enough is enough and they too flee.
Colonel Turner fails to contain himself and lets out a roar of excitement. The volunteers and the artillery worked perfectly in sync. Turner’s men are amazed by his actions and begin to wonder if he isn’t just a sickly weakling. Ever the perfectionist Captain Ayer is mostly happy with his crew’s actions. Scouts are deployed to follow the fleeing enemy units, taking potshots as they safely can, and a messenger is sent to General Hawkinsworth with news of the victory. The messenger rides the fastest horse available.
In celebration the Americans return to town, where they are greeted as heroes by the locals. Turner’s last actions are to post pickets in case the British return.
So, that’s my fan fiction account of the battle. A few things to note. The American militia was given the special abilities of Sharpshooter and First Fire. I had the one infantry regiment (plus cannon) versus three infantry regiments. Being outnumbered 3:1 Adrian, who devised the scenario, gave me these abilities in the hope of giving me a fighting chance. First Fire proved useless but Sharpshooter came in handy a few times. Even without it I managed to inflict heavy casualties. Once or twice it allowed me to re-roll a dice that turned into an extra casualty and thereby a break test. The artillery was mostly inconsequential but was more accurate near the game’s end.
The British were given the Crack ability. This allowed them to reroll a failed morale check if they had no casualties on the unit at the start of the turn. A few times they used the ability but to no avail. The superior defensive position made a huge difference as did superior dice rolling on my part.
One thing we noticed is that the game plays nicely on a 4×6 table with the Black Powder rules. But, it may be better served halving distances (both movement and shooting) on this size table. On a 8×6 full distance can remain in effect. Cort’s British crossed the table shortly after they got onto the table. It was a huge surprise to him and he wasn’t entirely prepared for what to do in that case.
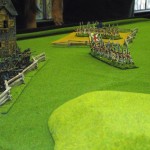
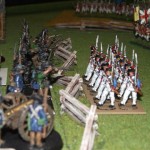
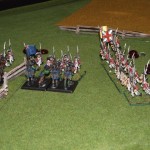
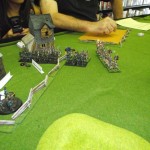
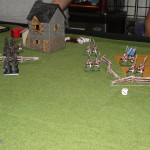
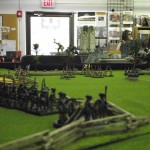
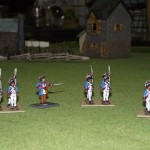
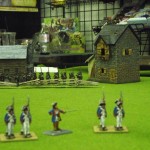
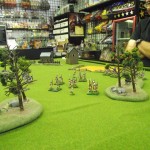
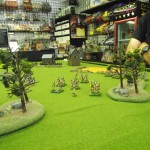
The game ended relatively quickly, which is great because we got to play other stuff after. Below you will find pictures. Adrian took them during the game. His are really good pictures. Many thanks to Adrian for writing up the scenario and taking pictures. Lots of thanks to Cort for being willing to try the game even though he doesn’t own the rulebook. This was a lot of fun, despite my winning, and we’re all excited to play again.

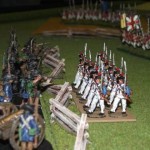
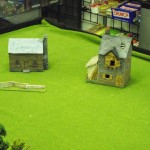
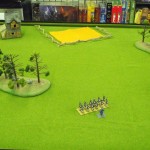
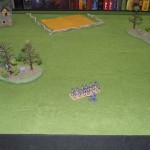
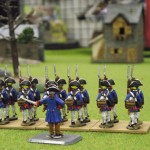
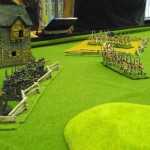


Jon that’s a great writeup; very entertaining reading!
One can’t help but wonder how many column inches would have been devoted to the Battle of Abington if the colonials had been paddled and sent packing… :D
I’m looking forward to the next game. The grenadier regiment is on the painting table. (Oh, who am I kidding? It’s the kitchen table…) Hopefully they’ll be done by then.
Lord Howe,
Commander of British forces in the colonies
Dispatches from the field
We have made contact with the enemy. Colonel Hawking and Lt Colonel Smyth ran their troops doggedly to contact the rebels. They underestimated their foe. Their men where tired and exhausted in such a dizzying display of speed. Colonel Hawking is being sent home to explain his failure to the home secretary. Lt Colonel Smyth is being re assigned to the Jamaica garrison.
I am planning placing a order today for some French. I will buy another battalion of british line to round out my brigade to three battalions.
Cort N
Some followup rules-wise from the game. As you recall, when engaged on the flank, we questioned whether or not the Americans were allowed to change face after the first round of combat. I remembered reading the rule, but couldn’t find it at the time. It’s on page 64 (I think, don’t have the book in front of me at the moment). A unit engaged in combat cannot move or fire until the combat is over. This might have made a difference in the outcome since you’re at a disadvantage when being meleed from the flank or rear.
Also, when the Cort’s unit in HtoH combat broke, the other unit was obliged to take a break test as well since it was supporting. I knew that, but forgot.
I’d be interested in playing out the 2nd turn of close combat with Cort’s unit still in my flank. Who knows how it’d turn out. And if they still break then see if the other unit breaks. Would be an interesting exercise…could even do it with counters or slips of paper instead of lining up all the models etc.
Thanks for double checking the rules. You are right that it could have, and probably would, have made a difference. I wouldn’t have taken any more casualties from Cort but my attacks would have suffered that -1 mod from being flanked.
Actually, maybe the only part that needs to be replayed is my attacks (I can roll the dice online!) with the -1 mod. Hmm, when I have time today I’ll do that and post the results. D&D has a good online dice rolling app at the Wizard’s site.
Pingback: CWF Game Cast Episode 62: The Battle of Abington | CWF Game Cast
Pingback: Let’s Talk Wargaming » Troll in the Corner
Pingback: ReCast: Battle of Abington - Wargaming Recon #62 - Wargaming Recon
Pingback: ReCast: Battle of Abington – Wargaming Recon #62 » Troll in the Corner